Some of my finest renderings of Torus Knots
(and other objects) created with Blender
I re-modeled my golfball with MoI, a new nurbs-based modeler. 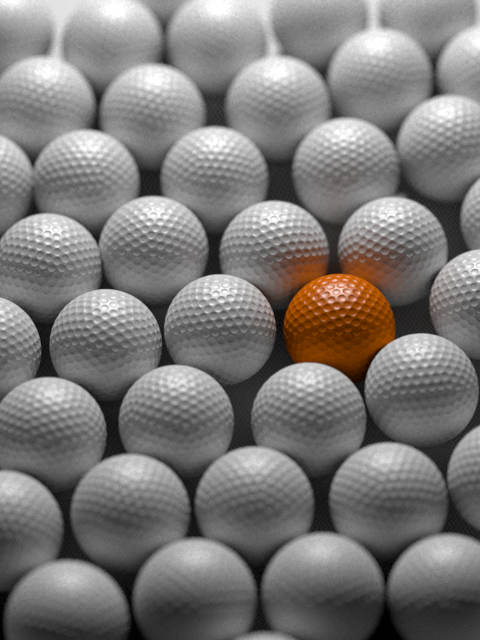 The result is a much more accurate surface, at the
expense of a polygon count that has increased by a factor of 10. At
the screen resolution shown, the difference is not noticeable, but at
print resolution (or in extreme closeup renders) the difference in the
dimple quality becomes clear.
The result is a much more accurate surface, at the
expense of a polygon count that has increased by a factor of 10. At
the screen resolution shown, the difference is not noticeable, but at
print resolution (or in extreme closeup renders) the difference in the
dimple quality becomes clear.
I rendered this image (in 23 minutes) with SunFlow and used single-bounce path-tracing, along with focal blur to create an added depth effect and extra realism. This scene has about 17 million faces.
This object is an inverted quintrino that was constructed with 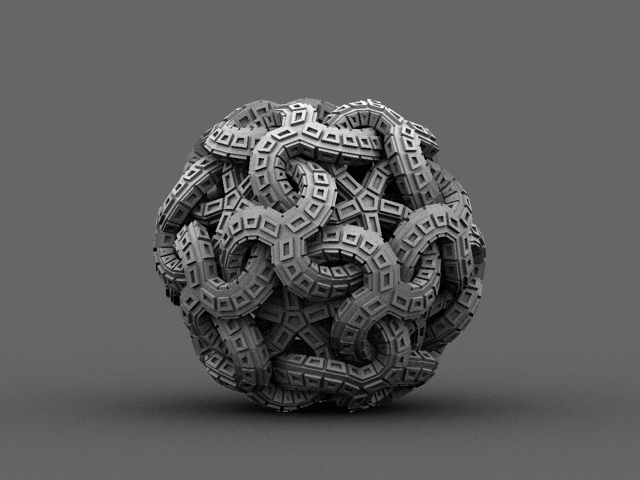 Blender's bezier curves, then completed with Wings.
The image is an animated gif that shows the original mesh, and one
that has been subdivided twice.
Blender's bezier curves, then completed with Wings.
The image is an animated gif that shows the original mesh, and one
that has been subdivided twice.
I rendered this image with SunFlow and used ambient occlusion along with an infinite plane to create a seamless background. It takes on the appearance of a star-like sea creature.
My latest creation is a photo-realistic Soccer Ball, modeled entirely with
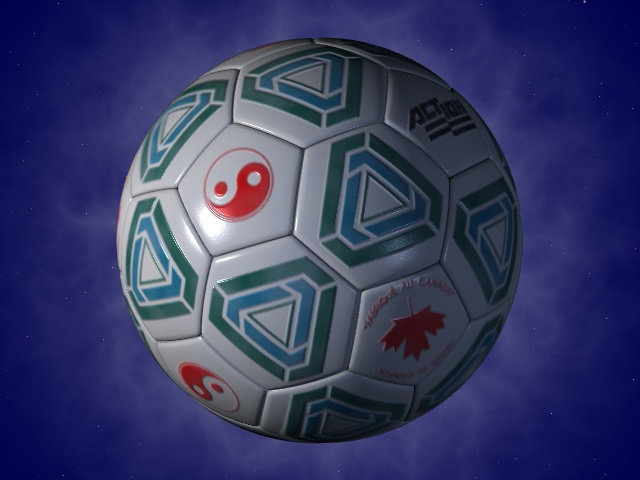 Wings (my first model), and rendered with Blender. I
attempted to create a subtle radiosity effect by using multiple
lights. Note the diffuse lighting on the right side, and the fact that
you can't tell where the shadows begin or end.
Wings (my first model), and rendered with Blender. I
attempted to create a subtle radiosity effect by using multiple
lights. Note the diffuse lighting on the right side, and the fact that
you can't tell where the shadows begin or end.
Two Wings3D tutorials are available for this object: one deals with the modeling, and the other deals with UV texturing using the powerful autouv feature. Both are available in the Info section.
Here is an exact model of a Spalding Top-Flite PLUS golf ball. It
was modeled and rendered entirely with Blender 1.80a, has 492 dimples, and
consists of approximately 61,000 vertices and 83,000 faces. The model is a
direct result of my deep interest in geometrical forms, Blender's
incredibly outstanding mesh editing tools, and my own ingenious
technique.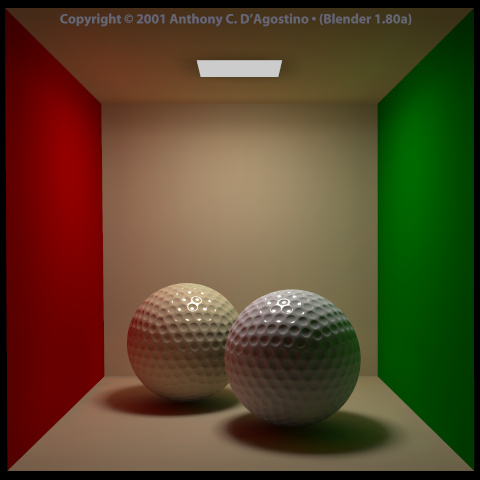
Note the subtle shading on the dimples that are indirectly illuminated, the soft shadows, and the color bleeding. This is a result of Blender's radiosity solver. Also note the specular highlights on the ball. This was done by setting the 'Ref' value to zero (so as not to disturb the radiosity solution) and increasing the 'Spec' and 'Hard' values (to provide a phong highlight). This procedure added highlights that accurately depict the hard plastic shell of a golf ball.
Now you can view this as a low-poly scene (682 faces) in RealTime. Click on the window that opens and use the arrow keys on the keypad. Press the 'Hkey' to toggle the help screen. Available as an 872 KB Windows executable.
This is a model of the time travel device from the TV series Seven
Days (TM & Copyright 1998-2001 by Paramount Pictures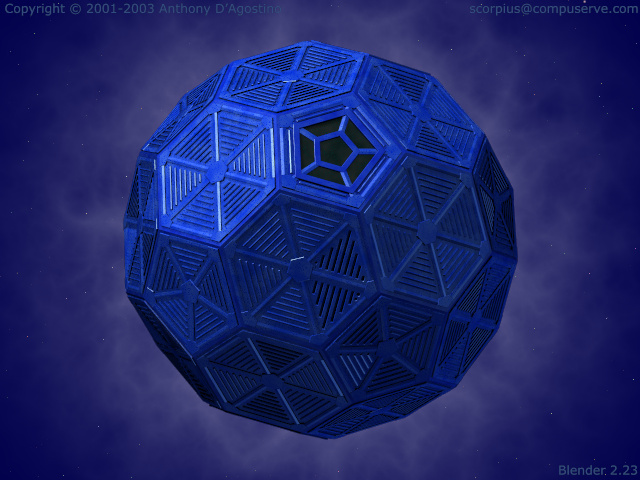 Corporation. All Rights Reserved).
The whole image—from the text to the background—was created
entirely with Blender 1.80a (no post processing). I've put
considerable amounts of time into the modeling, lighting, and materials.
Please note the subtle noisy/dirty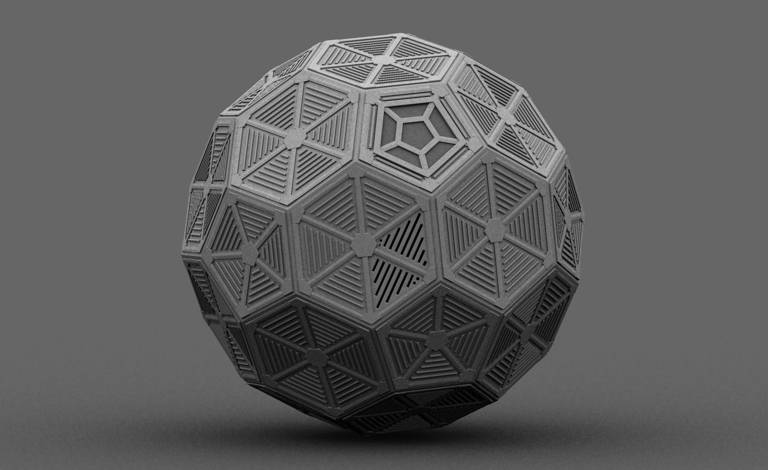 procedural texture on the panels. Also note the
highlights on the bevels of each nurnie.
procedural texture on the panels. Also note the
highlights on the bevels of each nurnie.
This is my first attempt at polygon modeling. Since I'm interested in polyhedra and geodesic domes, I decided to try and make the blue spherical device, which fascinated me from the very first time that I saw it. I'm proud of the way this image turned out, and would appreciate any comments. The grey image to the right was rendered with Sunflow using plain ambient occlusion.
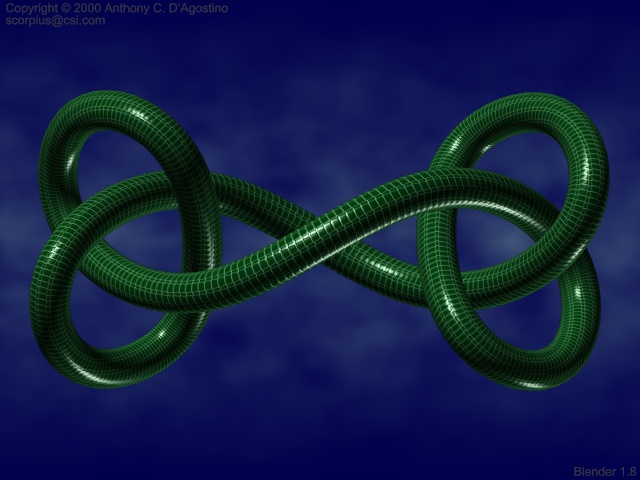
To the left is my first image created with Blender 1.74a. It's a standard
torus knot made out of a garden hose! Even though this looks like a simple
scene, I've worked 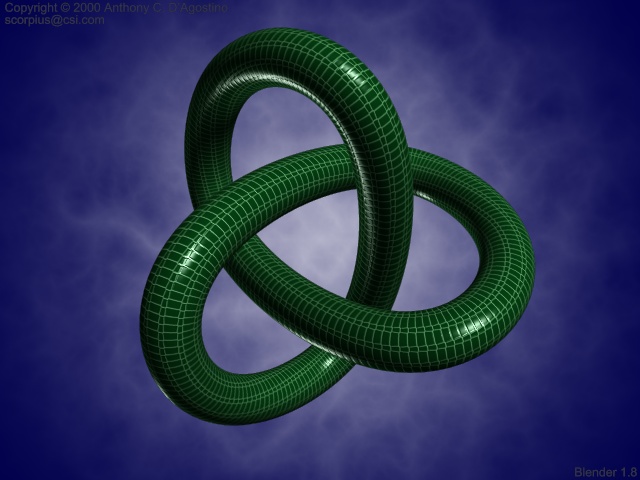 very hard on it. The garden hose texture is my own
custom painted image map (with a corresponding bump map, of course). I
made the object itself by extruding a bezier circle along the path of
a nurbs curve. I never know what to put in the background, so I
experimented with Blender's built in cloud and marble functions until
I got the gradient look that I
very hard on it. The garden hose texture is my own
custom painted image map (with a corresponding bump map, of course). I
made the object itself by extruding a bezier circle along the path of
a nurbs curve. I never know what to put in the background, so I
experimented with Blender's built in cloud and marble functions until
I got the gradient look that I 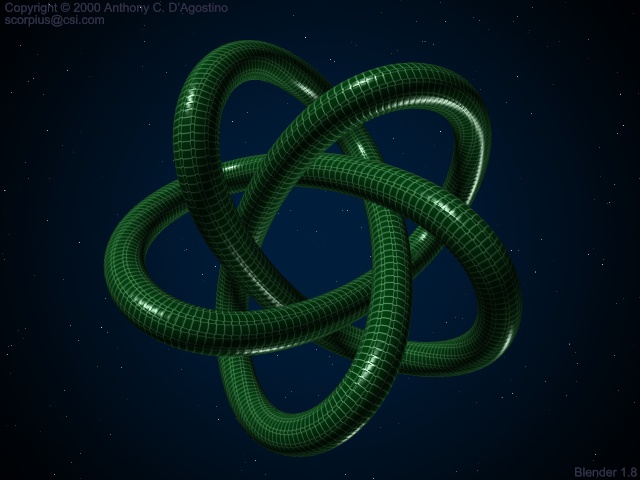 wanted. As with all of my images, no post-processing was
used.
wanted. As with all of my images, no post-processing was
used.
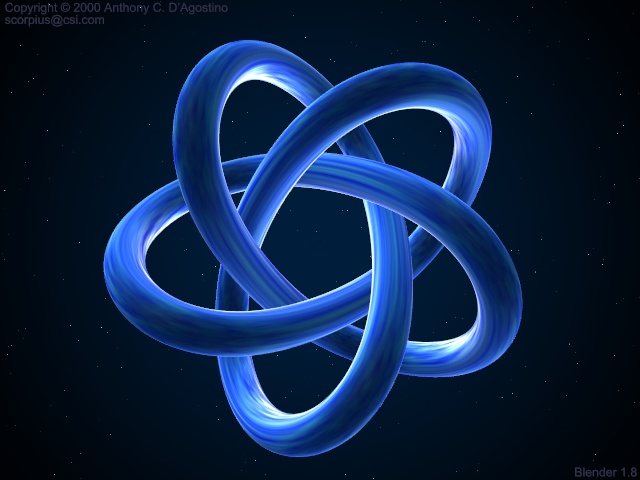
To the right is my second image done completely in Blender 1.74a. It is another type of torus knot, but this time I decided to use outer space for the background, so I experimented with the marble function until I got a subtle circular gradient. I think it adds more depth to the image and makes the knot look less flat. This one is my personal favorite. Below you will find some more variations of Torus Knots with different textures applied.

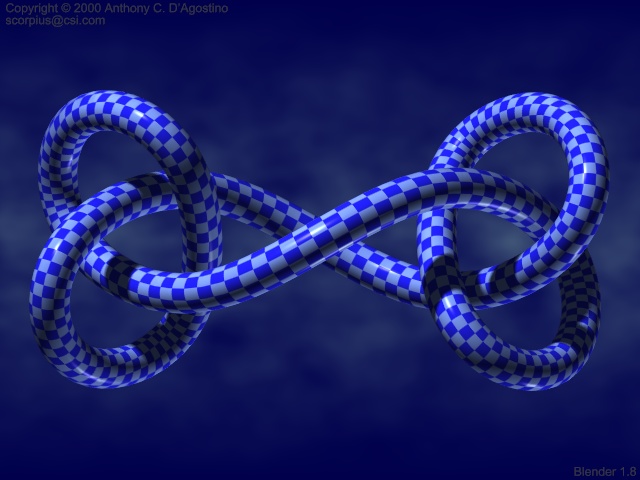
All images were rendered with Blender 1.74a to 1.80a.
Copyright © 2001-2003 Anthony D'Agostino
All rights reserved.